How to Set Up Power Platform ALM with Azure DevOps (Step-by-Step)
Set up Power Platform ALM with Azure DevOps step by step: service connections, a build pipeline and a release that deploys your solutions.
Intro
Moving Power Platform solutions between environments can get complicated fast. A single solution often contains apps, flows, copilots, Dataverse tables, and business rules that all need to land correctly in test or production. Manually exporting and importing works for a quick fix, but it quickly becomes error-prone and hard to manage. The best practice is to use Azure DevOps for Application Lifecycle Management (ALM). In this post, I’ll walk through how to set up service connections, pipelines, and releases in DevOps so you can deploy solutions in a structured, repeatable, and reliable way.
Service Connection(s)
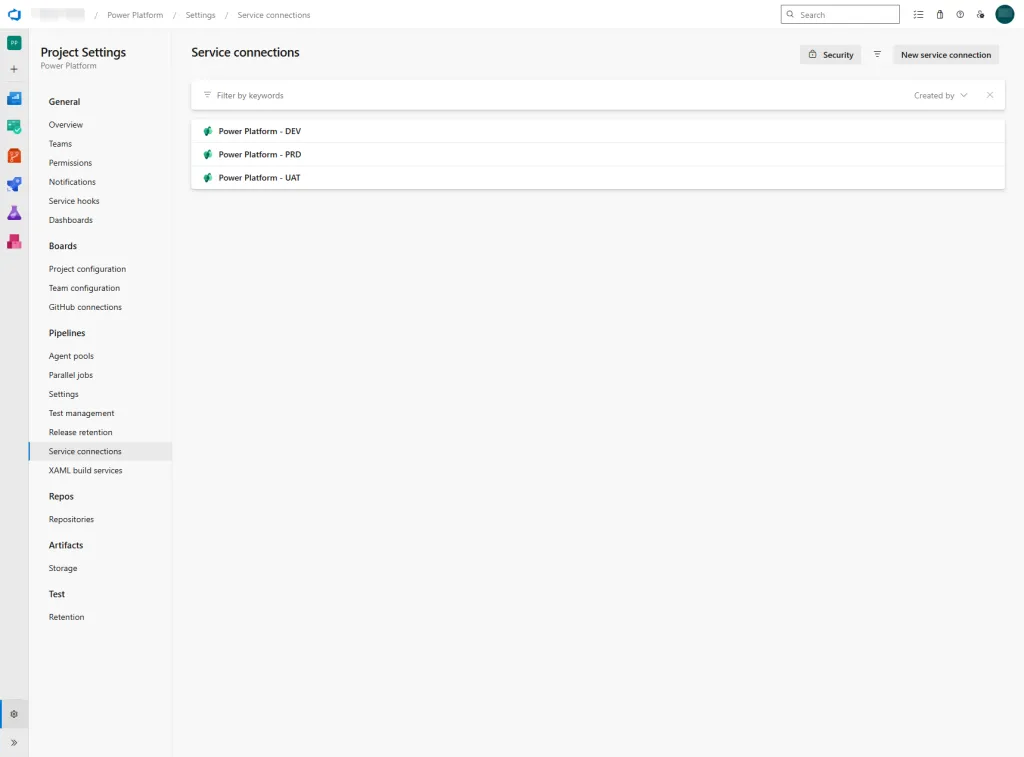
To connect with Power Platform environments during builds and deploys, service connections are used: Project settings > Pipelines > Service connections. For each environment a service connection is created in DevOps and is added as a app user in the environment with the correct role.
The connections are identified in the JSON as such:
authenticationType: PowerPlatformSPN
PowerPlatformSPN: 'Power Platform Development'Update PowerPlatformSPN with the DevOps name to use a different service connection.Example:
authenticationType: PowerPlatformSPN
PowerPlatformSPN: 'Power Platform Test'
Create connection to new environment
The app registration should be created in the target tenant, the tenant in which the Power Platform environment resides.
You can connect to environments in different tenants from DevOps, as long as the app registration is in the correct tenant.
Create a new app registration in Azure:
Add the app user to the environment in Power Platform Admin Center:
Go to the list of users and open the app user list:

Click button to add app user:

Assign role System Customizer or System Administrator.
In DevOps, go to Project Settings, service connections.
Create a new service connection of type Power Platform.
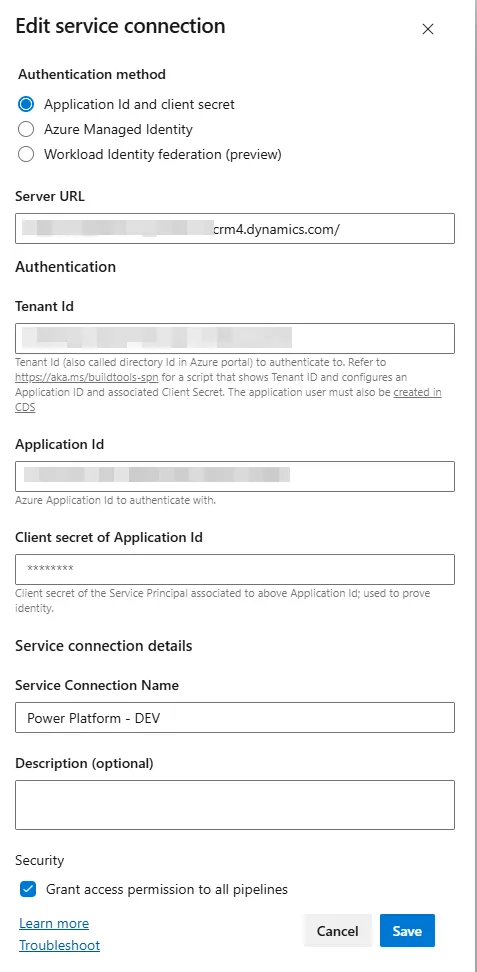
Server URL: the CRM URL from the environment (example: org29faf336.crm4.dynamics.com )
Use the tenant ID, app ID, and secret from the created app registration.
Create a pipeline
Import a new pipeline from this template JSON
- Pipeline
- Name: give a proper name to the pipeline, number them if needed
- Agent pool: Azure Pipelines
- Agent Specification: windows latest
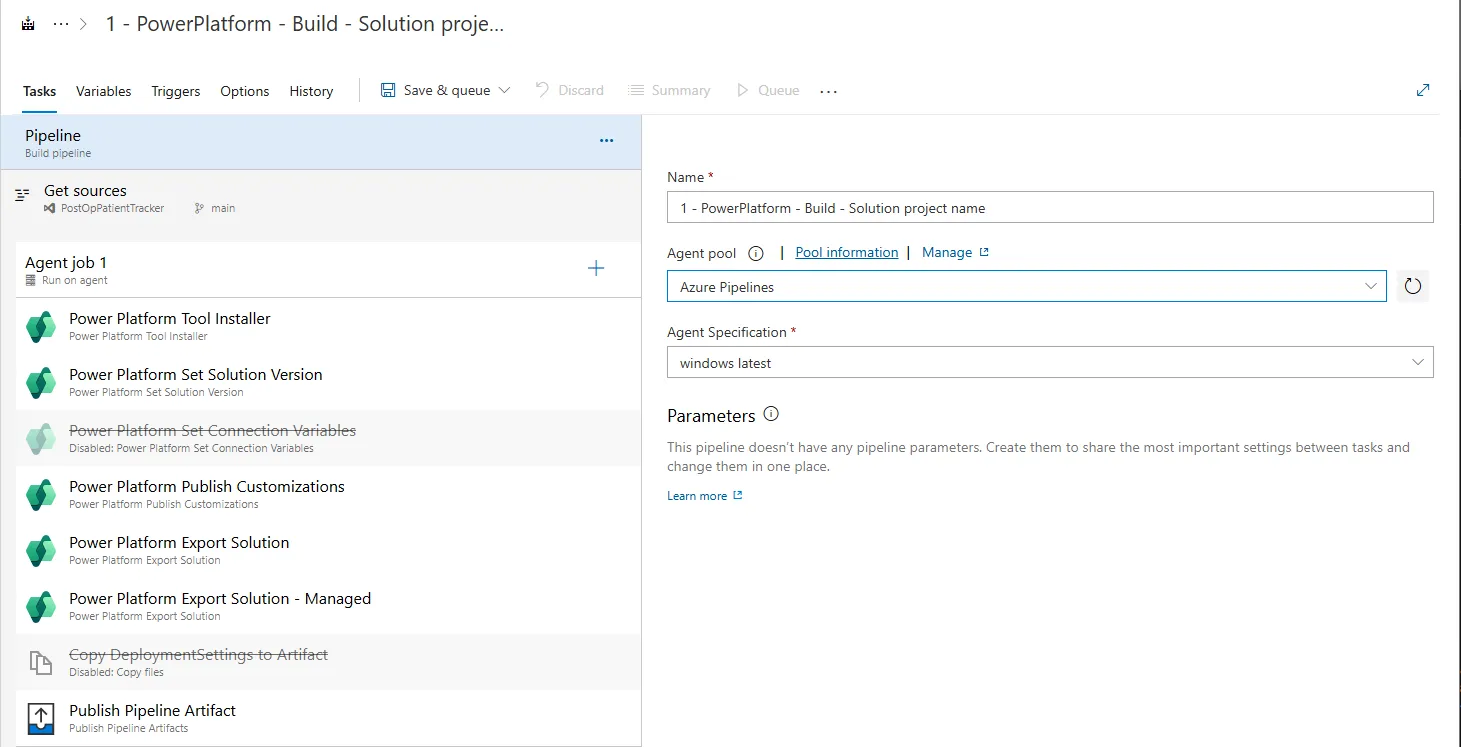
- Power Platform Tool installer
- nothing
- Power Platform Set Solution Version
Select authentication type: Service principle
Service connection: your connection you previously added
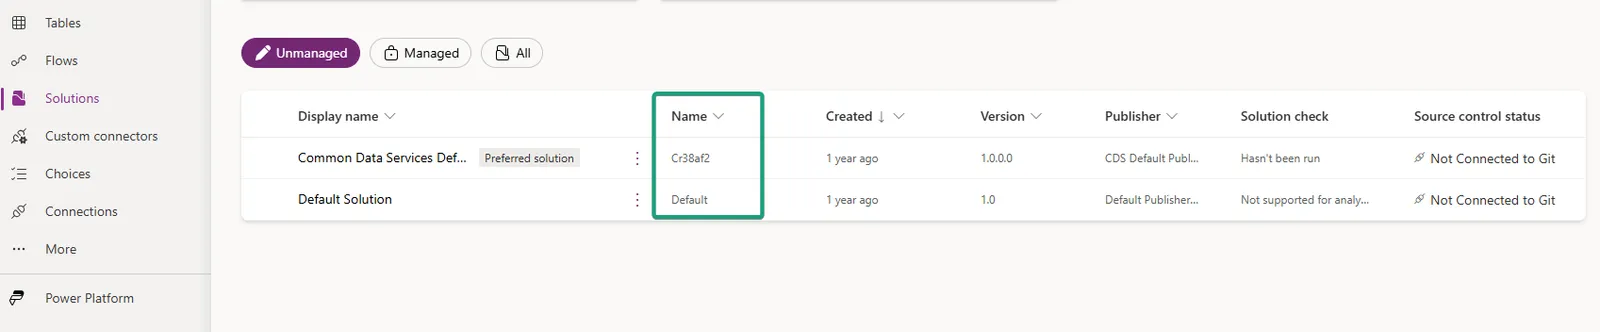
Solution name:
- Disabled: Power Platform Set Connection Variables
- Only if necessary
- Power Platform Publish Customizations
- Service connection: your connection you previously added
- Power Platform Export Solution
Service connection: your connection you previously added
Solution name
Solution output file: Solution/[SolutionName]*.zip
* see Power Platform Set Solution Version – Solution name
- Power Platform Export Solution – Managed
- Service connection: your connection you previously added
- Solution name
- Solution output file: Solution/[SolutionName]*_Managed.zip
- Disabled: Copy DeploymentSettings to artifact
- Only if necessary
- Publish Pipeline Artifact
- Artifact name: Solution-[SolutionName]*
* see Power Platform Set Solution Version – Solution name
Create a release
Import from thistemplate JSON.
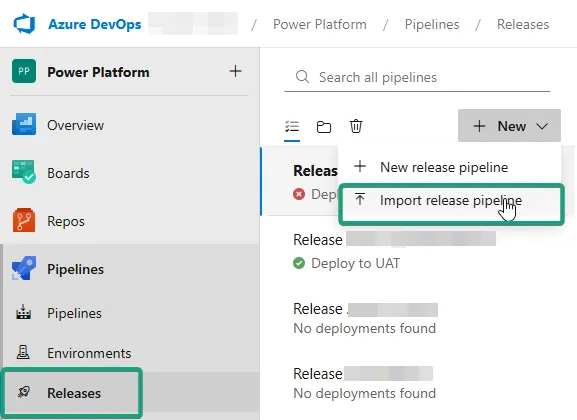
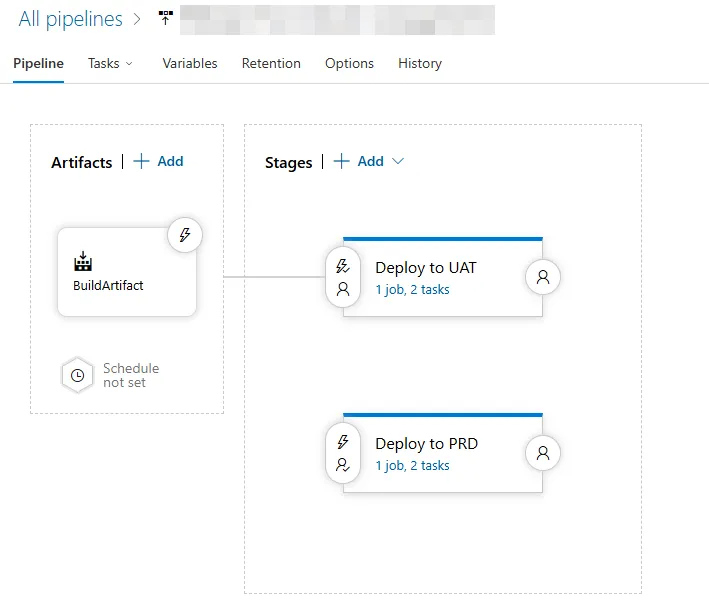
Following release is imported, so you can easily start from a template:
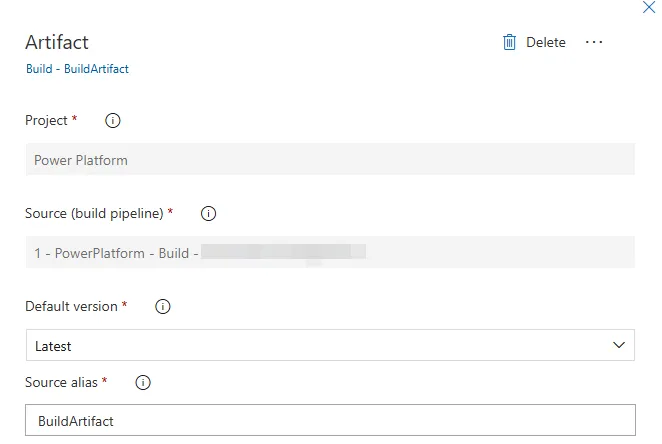
- Edit the artifact
- Project
- Source: select your previously created pipeline
- Default version: Latest
- Source alias: BuildArtifact
- Add a stage per environment (eg. Deploy to TST, Deploy to UAT and Deploy to PRD.
- Edit the pre-deployment conditions accordingly
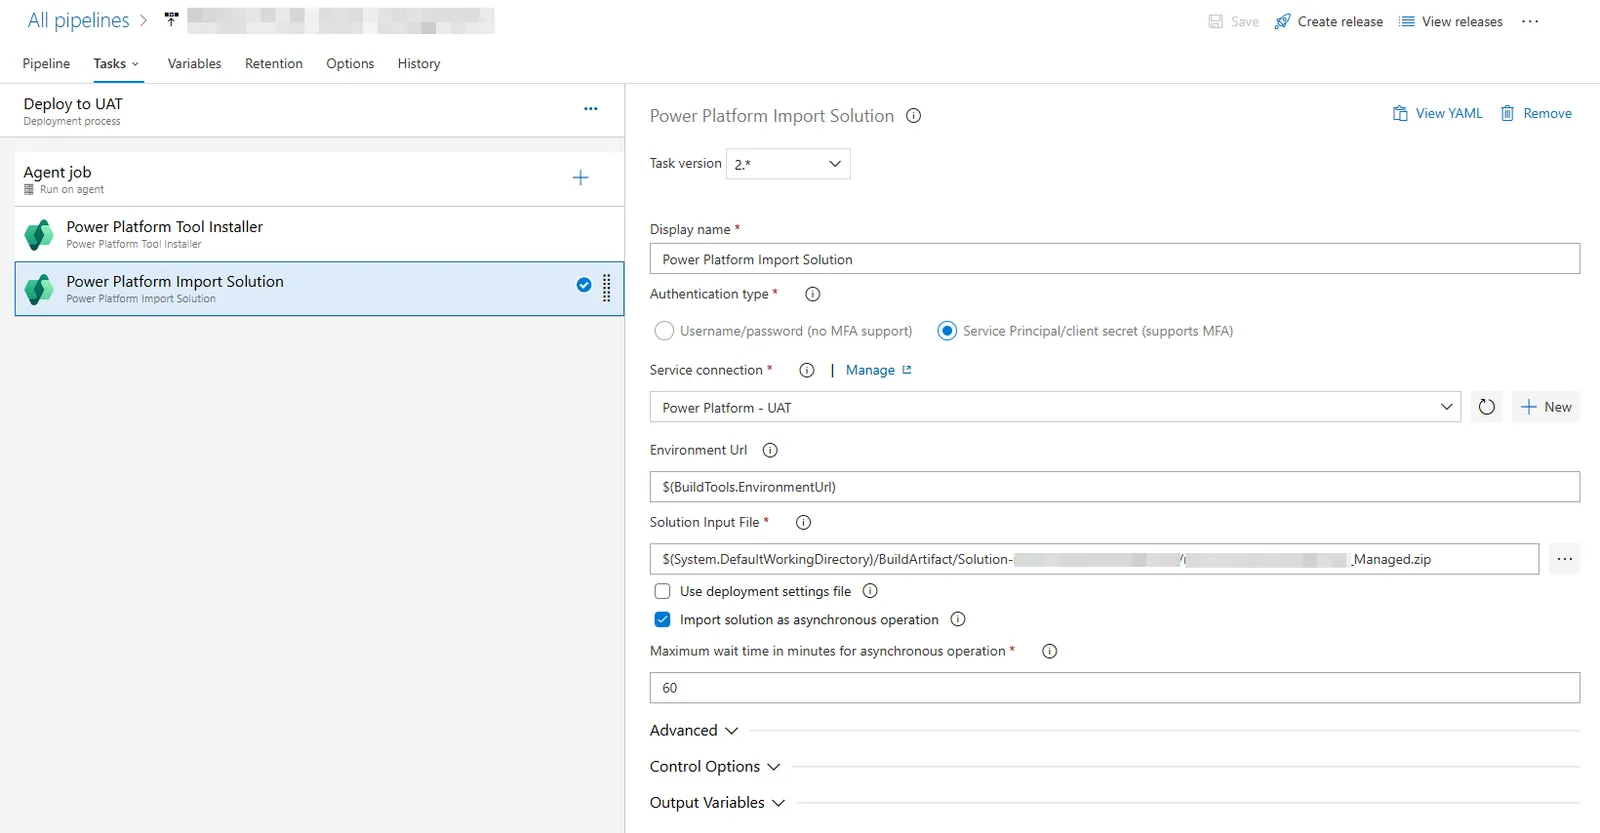
Example Deploy to UAT:
- Agent job
- Agent pool: Azure Pipelines
- Agent Specification: windows-latest
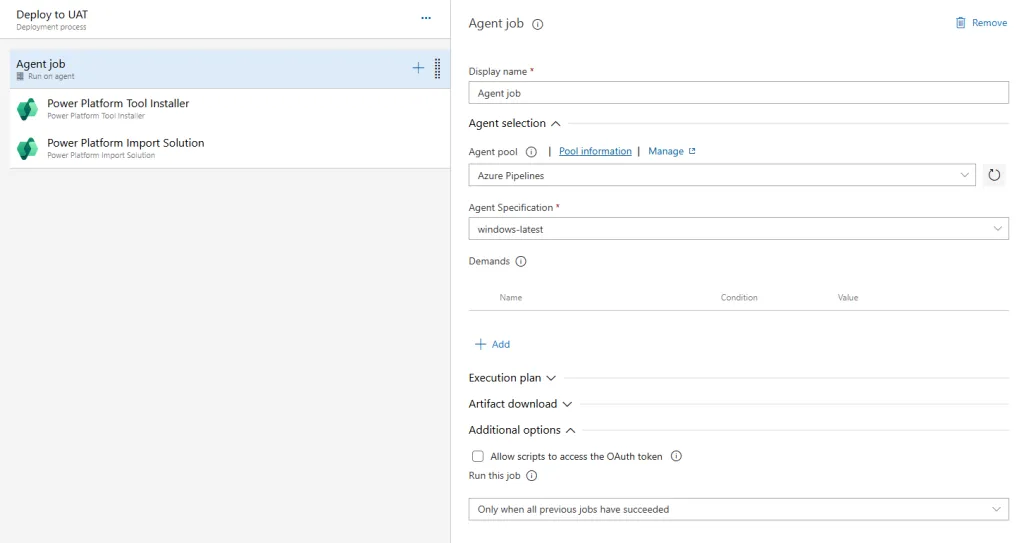
- Power Platform Tool Installer:
- Nothing to configure
- Power Platform Import Solution
- Select the correct service principal
- Solution Input file: $(System.DefaultWorkingDirectory)/BuildArtifact/Solution-[SolutionName]*/[SolutionName]*_Managed.zip
Extras
Trigger (MS docs link)
After release
After stage
Manual only
Select “After release” to deploy to this stage each time a new release is created. Select “After stage” to deploy after successful deployments to selected stages. Select “Manual only” to allow only manual deployments.
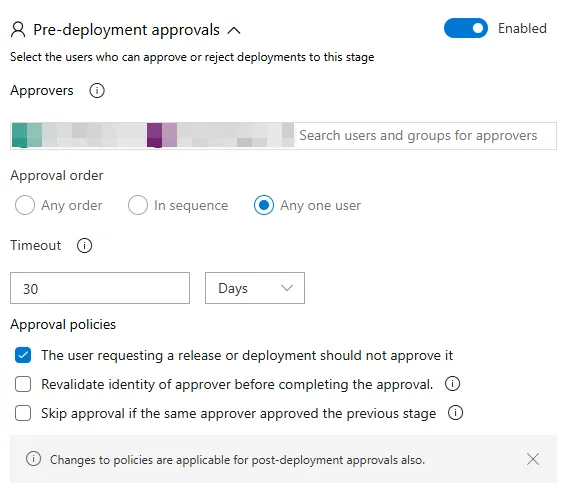
Pre-deployment approval (MS docs link)
Possible to add users in a certain order with a timeout. Also policies can be applied.
Deploy
- Run the pipeline and check if succesful
- Create a new release and deploy accordingly
Published